Vim is probably one of the most powerful text editors out there. I use it for working on my projects, writing quick scripts, and even writing this blog post. I’ve setup my vim to be a JavaScript, TypeScript and Python IDE, without much performance degradation. ‘How is that even possible?’, you might ask. ‘Vim cannot be an IDE!’, shouts the unconvinced watcher. Well, heres my vim:
So, just read on 😃
Let’s Start!
First things first, ditch the default vim. Yes, I know I’ve been touting the benefits of vim so far, but theres a better alternative: neovim. Use the unstable build of neovim (atleast 0.4). It is much faster and has more features, and the bugs are not that big of an issue. Run :checkhealth and get the python and node support working.
Even the default neovim needs to be extended to fit our needs of an IDE. We use plugins to do this, via a plugin manager called vim-plug. Let’s configure our neovim to use the plugin manager.
" vim-plug auto setuplet plugpath = expand('<sfile>:p:h'). '/autoload/plug.vim'if !filereadable(plugpath)    if executable('curl')        let plugurl = 'https://raw.githubusercontent.com/junegunn/vim-plug/master/plug.vim'        call system('curl -fLo ' . shellescape(plugpath) . ' --create-dirs ' . plugurl)        if v:shell_error            echom "Error downloading vim-plug. Please install it manually.\n"            exit        endif    else        echom "vim-plug not installed. Please install it manually or install curl.\n"        exit    endifendif
call plug#begin('~/.local/share/nvim/plugged')
" Plugins go here like this:" Plug '<link>'
call plug#end()
" General Settings" Do not worry too much about what this does, I don't have a clue either :^)filetype plugin indent onsyntax onset encoding=utf-8set tabstop=2set expandtabset autoindentset shiftwidth=2set scrolloff=3set showcmdset hiddenset wildmenuset visualbellset splitbelowset ttyfastset rulerset backspace=indent,eol,startset numberset ignorecaseset smartcaseset gdefaultset incsearchset showmatchset hlsearchset wrapset linebreakset nolistset shortmess+=c
" rest of the configuration goes here
Put the above code into the neovim configuration file, usually ~/.config/nvim/init.vim. Code (written in VimL) in the file is loaded on startup to initialize our neovim to our liking. We will be adding almost all our configuration to this file, so keep note. Next, its time to go shopping for plugins!
There are quite a lot of plugins available to vim, and by extension, neovim. The best place to find them is usually through VimAwesome, but today I’m focusing on the bare minimum of the IDE experience. Let’s install some completion and syntax highlighting.
Completion and Syntax Highlighting
Add these lines to the plugins list:
Plug 'neoclide/coc.nvim', {'do': { -> coc#util#install() }}Plug 'sheerun/vim-polyglot'The first plugin is called coc, which is our completion engine. It is currently the best asynchronous completion engine for JavaScript and TypeScript, due to the reason that it’s based off Language Server Protocol. This is what Visual Studio Code uses internally for its completion, and coc extends this by also providing neovim with both completion and refactoring actions, such as go to definition, go to references, rename and many others, including language-specific actions such as sort-imports for python. All in all, it is one of the hottest plugins for making your vim into an IDE! Remember to go over to the extension’s site and follow the additional install instructions too.
For our syntax highlighting needs, we have vim-polyglot, which provides syntax files for a variety of languages. ‘Nuff said 😛
At this point in time, if you load up a JavaScript project, you will still see no completions. You need to actually install your plugins first! Do this via :PlugInstall. Next up, you will need to install coc extensions, which are the actual packages that provide access to a language’s Language Server Protocol. Here is an example:
let g:coc_global_extensions = ["coc-css", \ "coc-eslint", \ "coc-html", \ "coc-json", \ "coc-prettier", \ "coc-python", \ "coc-tslint", \ "coc-tsserver", \ "coc-ultisnips", \ "coc-tailwindcss", \ "coc-vetur"]Adding the above lines to your config file will make it install the extensions automatically. Now, open your JavaScript project and watch the magic 😎
coc can be configured even further! Add a file called ~/.config/nvim/coc-settings.json and put this in:
{ "suggest.maxCompleteItemCount": 20, "eslint.filetypes": [ "javascript", "typescript", "typescriptreact", "javascriptreact" ], "diagnostic.infoSign": "ღ", "diagnostic.hintSign": "ஐ", "diagnostic.warningSign": "⚠", "diagnostic.errorSign": "✖", "diagnostic.enable": true, "diagnostic.signOffset": 9999999, "diagnostic.highlightOffset": 9999999, "diagnostic.refreshOnInsertMode": true, "suggest.completionItemKindLabels": { "keyword": "\uf1de", "variable": "\ue79b", "value": "\uf89f", "operator": "\u03a8", "function": "\u0192", "reference": "\ufa46", "constant": "\uf8fe", "method": "\uf09a", "struct": "\ufb44", "class": "\uf0e8", "interface": "\uf417", "text": "\ue612", "enum": "\uf435", "enumMember": "\uf02b", "module": "\uf40d", "color": "\ue22b", "property": "\ue624", "field": "\uf9be", "unit": "\uf475", "event": "\ufacd", "file": "\uf723", "folder": "\uf114", "snippet": "\ue60b", "typeParameter": "\uf728", "default": "\uf29c" }, "python.pythonPath": "python"}This will give better glyphs in the side gutter, and give better icons in the completion popup menu (the default is just letters, e.g. v for value, f for function).
File Explorer With Icons
What IDE doesn’t have a file explorer? I’ve always missed Visual Studio’s Solution Explorer while using Vim, and netrw, the default file explorer, is pretty clunky, and theres no icons. Luckily for me, theres nerdtree ! Add these plugins:
Plug 'scrooloose/nerdtree'Plug 'ryanoasis/vim-devicons'Note that you have will also have to install and set your terminal font to one of the available nerd-fonts so that the icons will appear. I personally use FuraCode, which has ligatures for programming languages (needs terminal support, of course). Here is the configuration for the plugins:
let g:NERDTreeShowHidden = 1let g:NERDTreeMinimalUI = 1let g:NERDTreeWinPos = 'rightbelow'let g:NERDTreeIgnore = ['^\.DS_Store$', '^tags$', '\.git$[[dir]]', '\.idea$[[dir]]', '\.sass-cache$']let g:NERDTreeStatusline = ''" Automaticaly close nvim if NERDTree is only thing left openautocmd bufenter * if (winnr("$") == 1 && exists("b:NERDTree") && b:NERDTree.isTabTree()) | q | endif
" vim-deviconslet g:webdevicons_enable = 1let g:webdevicons_enable_nerdtree = 1let g:webdevicons_enable_unite = 1let g:webdevicons_enable_vimfiler = 1let g:webdevicons_enable_airline_tabline = 1let g:webdevicons_enable_airline_statusline = 1let g:webdevicons_enable_ctrlp = 1let g:webdevicons_enable_flagship_statusline = 1let g:WebDevIconsUnicodeDecorateFileNodes = 1let g:WebDevIconsUnicodeGlyphDoubleWidth = 1let g:webdevicons_conceal_nerdtree_brackets = 1let g:WebDevIconsNerdTreeAfterGlyphPadding = '  'let g:WebDevIconsNerdTreeGitPluginForceVAlign = 1let g:webdevicons_enable_denite = 1let g:WebDevIconsUnicodeDecorateFolderNodes = 1let g:DevIconsEnableFoldersOpenClose = 1let g:DevIconsEnableFolderPatternMatching = 1let g:DevIconsEnableFolderExtensionPatternMatching = 1let WebDevIconsUnicodeDecorateFolderNodesExactMatches = 1
After that, you can run :NERDTreeToggle to toggle your ‘file explorer’ window on and off.
Status bar and Startup page
You have probably seen fancy powerline-style status bars being used in /r/vimporn, and of course, I use it too. Also, what good is an IDE without a Startup page?
Plug 'vim-airline/vim-airline'Plug 'mhinz/vim-startify'Here’s all the configs needed:
" Startify then NERDTree, on startupautocmd VimEnter *                \   if !argc()                \ |   Startify                \ |   NERDTree                \ |   wincmd w                \ | endif

" air-linelet g:airline_powerline_fonts = 1let g:airline_extensions = ['branch', 'hunks', 'coc', 'tabline']let g:airline#extensions#tabline#formatter = 'unique_tail_improved'let g:airline#extensions#tabline#buffer_nr_show = 1let g:airline#extensions#default#layout = [['a', 'b', 'c'], ['x', 'z', 'warning', 'error']]let g:airline_skip_empty_sections = 1let airline#extensions#coc#stl_format_err = '%E{[%e(#%fe)]}'let airline#extensions#coc#stl_format_warn = '%W{[%w(#%fw)]}'" Configure error/warning section to use coc.nvimlet g:airline_section_error = '%{airline#util#wrap(airline#extensions#coc#get_error(),0)}'let g:airline_section_warning = '%{airline#util#wrap(airline#extensions#coc#get_warning(),0)}'"let g:airline_theme = '<set to something sexy>'
Now, if you open up your vim with no arguments, you can see this: 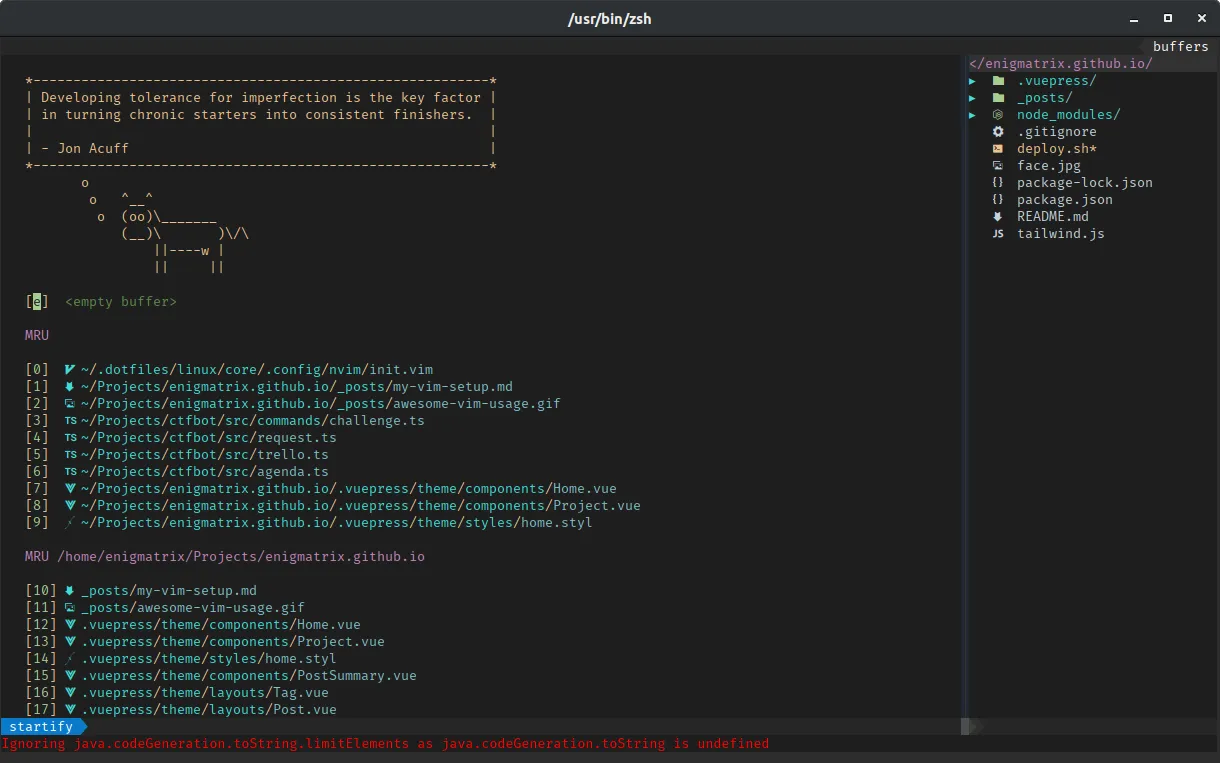
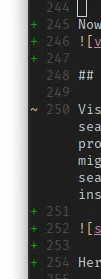
Searching
Visual Studio with Resharper had this awesome feature: global fuzzy search with CTRL+T. You can search absolutely anything, from files to even text in files, across the entire project. We can make neovim have this feature too, via denite. However, for in-file searching, the above might be overkill, and might actually slow you down with too may results. We should aim to use the default vim search, /<search> for it. We will be enhancing it, of course 😄, with incsearch, which highlights all instances of the search term, as you type the term. Here is an example of what I mean:
Here are the necessary plugin lines to replicate that:
Plug 'haya14busa/incsearch.vim'Plug 'Shougo/denite.nvim'denite is quite complicated to setup, and I’ve made it even more complicated by using ripgrep, the fastest grep clone right now (written in Rust, by the way). Go ahead and install ripgrep, then use this configuration:
" Denitecall denite#custom#var('file/rec', 'command', ['rg', '--hidden', '--files', '--glob', '!.git'])"call denite#custom#var('grep', 'command', ['rg'])call denite#custom#var('grep', 'default_opts', ['--smart-case', '--follow', '--hidden', '--vimgrep', '--heading'])call denite#custom#var('grep', 'recursive_opts', [])call denite#custom#var('grep', 'pattern_opt', ['--regexp'])call denite#custom#var('grep', 'separator', ['--'])call denite#custom#var('grep', 'final_opts', [])
call denite#custom#map(        \ 'insert',        \ '<Down>',        \ '<denite:move_to_next_line>',        \ 'noremap'        \)call denite#custom#map(        \ 'insert',        \ '<Up>',        \ '<denite:move_to_previous_line>',        \ 'noremap'        \)
" Remove date from buffer listcall denite#custom#var('buffer', 'date_format', '')
" Custom options for Denite"   auto_resize             - Auto resize the Denite window height automatically."   prompt                  - Customize denite prompt"   direction               - Specify Denite window direction as directly below current pane"   winminheight            - Specify min height for Denite window"   highlight_mode_insert   - Specify h1-CursorLine in insert mode"   prompt_highlight        - Specify color of prompt"   highlight_matched_char  - Matched characters highlight"   highlight_matched_range - matched range highlightlet s:denite_options = {'default' : {\ 'auto_resize': 1,\ 'direction': 'rightbelow',\ 'winminheight': '10',\ 'highlight_mode_insert': 'Visual',\ 'highlight_mode_normal': 'Visual',\ 'prompt_highlight': 'Function',\ 'highlight_matched_char': 'Function',\ 'highlight_matched_range': 'Normal'\ }}
" Loop through denite options and enable themfunction! s:profile(opts) abort  for l:fname in keys(a:opts)    for l:dopt in keys(a:opts[l:fname])      call denite#custom#option(l:fname, l:dopt, a:opts[l:fname][l:dopt])    endfor  endforendfunction
call s:profile(s:denite_options)
nmap _ :DeniteProjectDir -split=floating -winrow=1 file/rec grep:::!<CR>
It uses _ instead of CTRL-T, but that is just due to my personal preference in Linux systems (and its similarity to radare2’s _ HUD display).
Git integration
No IDE is complete without source control integration. I only use git, so i’ve used the best plugins for it.
Plug 'airblade/vim-gitgutter'Plug 'tpope/vim-fugitive'vim-gitgutter adds a gutter to the left of your code that displays the git status of the line to the right of it. e.g. if a line is added, it will show +, changed will be ~ and so on. vim-fugitive adds a shitton of git commands as vim commands, and provides tight integration between both.
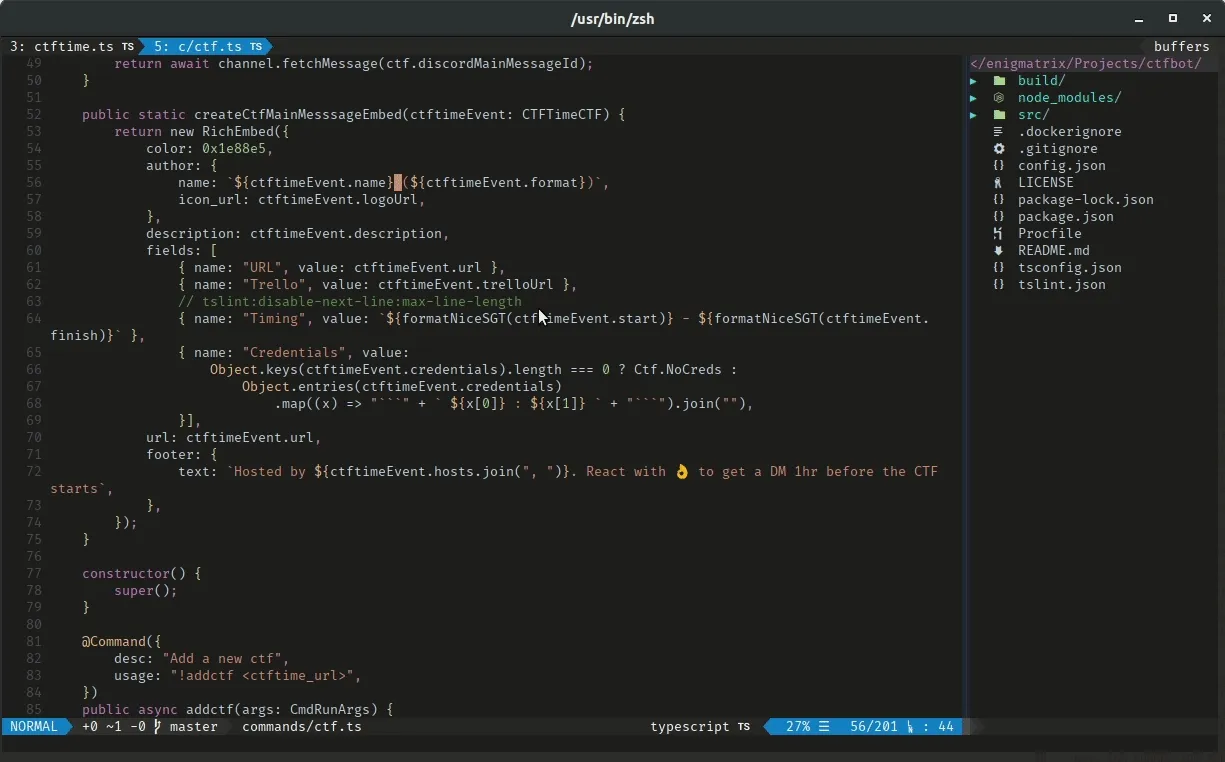
Aesthetics
If you haven’t realised it by now, I miss Visual Studio when working in Linux. And yes, I’ve basically been trying to recreate Visual Studio in vim this entire blog post. And you’ve been here, reading through it all.
I’ve got you, hook, line and sinker
Anyway, let’s make it look like Visual Studio too. Add these plugins:
Plug 'tomasiser/vim-code-dark'Plug 'mg979/vim-studio-dark'Next, set up the background as such:
" backgroundif (has("nvim"))    "For Neovim 0.1.3 and 0.1.4 < https://github.com/neovim/neovim/pull/2198 >    let $NVIM_TUI_ENABLE_TRUE_COLOR=1  endif  "For Neovim > 0.1.5 and Vim > patch 7.4.1799 < https://github.com/vim/vim/commit/61be73bb0f965a895bfb064ea3e55476ac175162 >  "Based on Vim patch 7.4.1770 (`guicolors` option) < https://github.com/vim/vim/commit/8a633e3427b47286869aa4b96f2bfc1fe65b25cd >  " < https://github.com/neovim/neovim/wiki/Following-HEAD#20160511 >  if (has("termguicolors"))    set termguicolors  endif"set background=darkset t_Co=256set t_ut=colorscheme vsdark
let g:airline_theme = 'codedark'let g:Vsd.contrast = 2  " high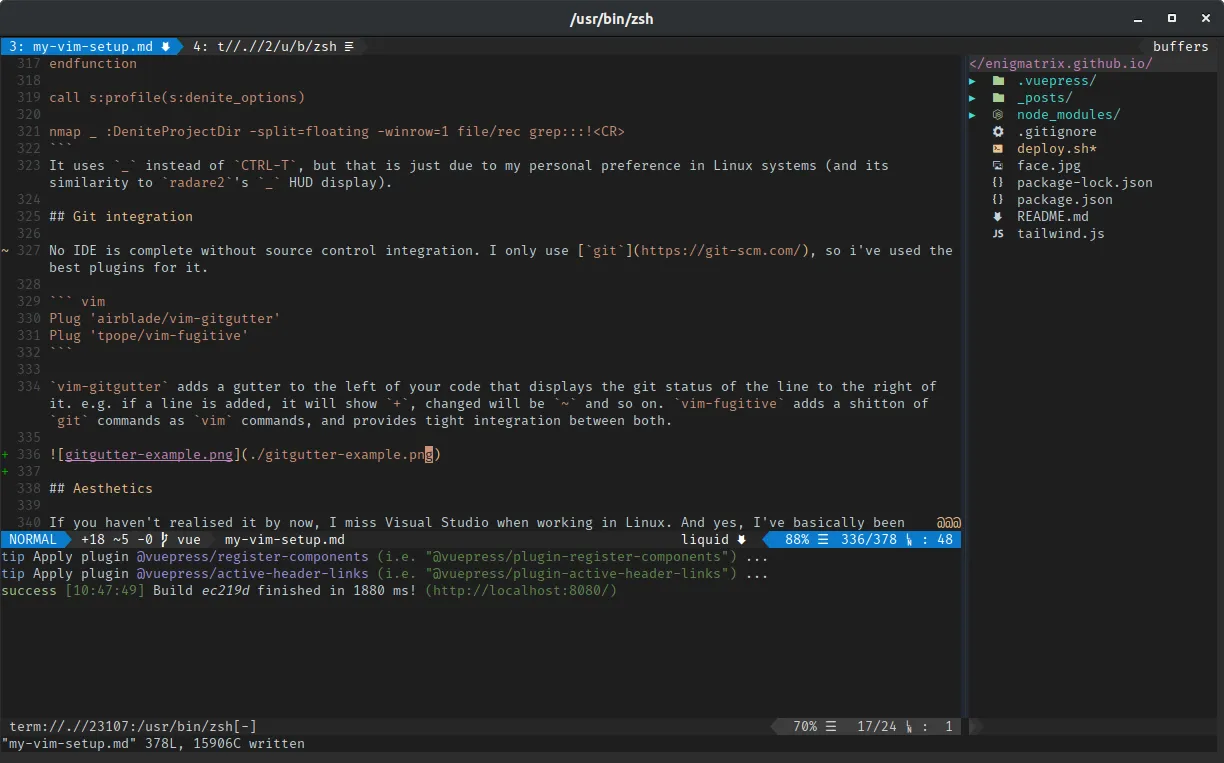
Look at that 😮, doesn’t it look just like Visual Studio Code? Besides, with all the functionality available, I can honestly say that it feels just like Visual Studio (well, Visual Studio Code only, really), but with a better editing experience and with smoother performance.
Conclusion
Honestly, I don’t think anyone would want to recreate the entirety of my setup. It might bring too many bad memories to people who have converted to vim in Linux from actual IDEs in Windows. Just in case there actually are, here are my dotfiles, and you can find my actual inti.vim there. There are keymappings there, too, along with other plugins such as UltiSnips and convenience features.